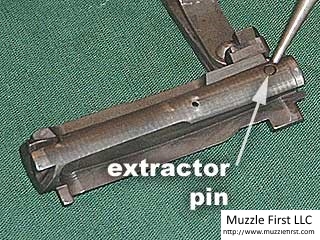
Disassembly Instructions
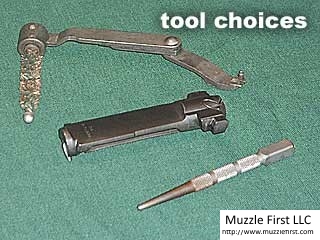
There are multiple ways to disassemble and reassemble the M1
Garand Bolt. We cover two ways, using two different tools. The
instructions below show using a standard steel punch or using
the Garand Combo Tool. I actually prefer disassembling the bolt
using the punch, it seems simpler to me.
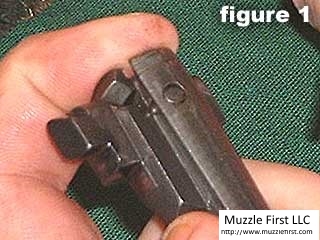
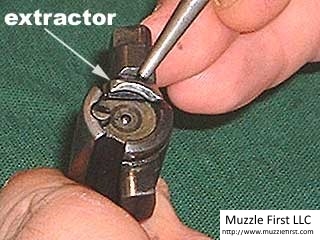
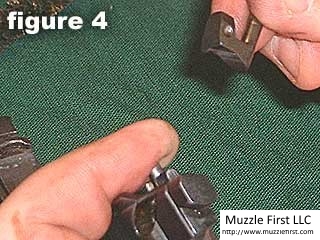
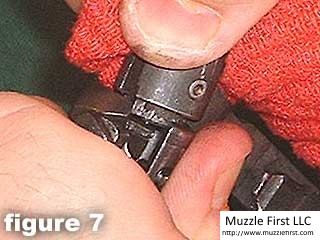
1) Place your finger over the bolt face (as shown infigure 1).
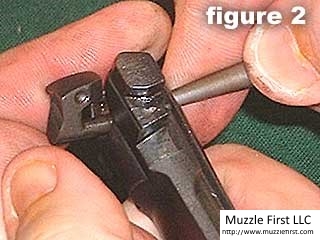
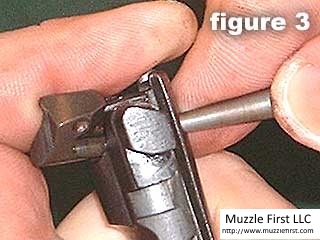
2) While applying quite a bit of downward pressure on thebolt
face, take the punch and push out the extractor (as shown in
figure 2).
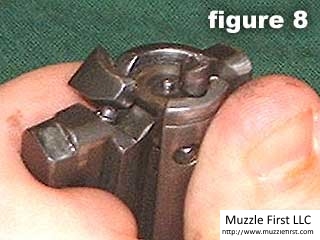
3) Make sure the ejector does not spring (fly) out of thebolt.
4) Remove the extractor while allowing the ejector spring and
ejector to decompress against your finger.
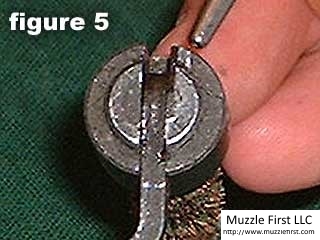
5) You can also use the Garand Combo tool to remove the
extractor. Figure 5 shows the part of the tool that is used to
remove the bolt's extractor and the punch is pointing towards a
notch.
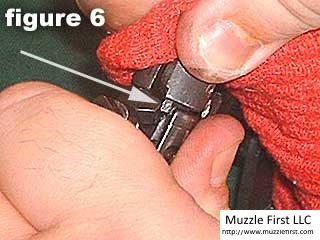
6) Place the tool, with notch, against the bolt face. Make sure
to place notch of tool between extractor and bolt (as shown in
figure 6).
7) Rotate tool, while applying quite a bit of downward pressure,
clockwise. You have to hold onto the wire brush on the tool and
this is uncomfortable, so I wrap a rag around the brush to
protect my hand.
8) The tool forces the extractor to disconnect and allows the
ejector spring and ejector to decompress, without flying out.
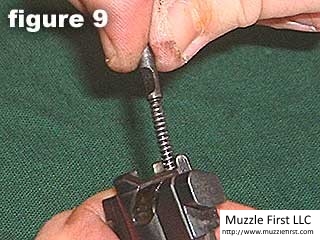
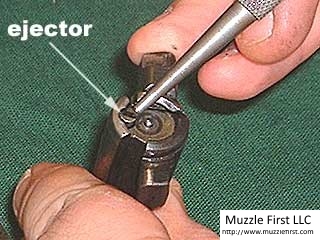
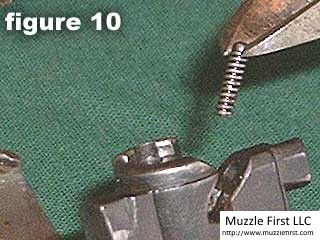
9) After using either the punch or Garand Combo Tool, you can
remove the ejector and ejector spring (as shown in figure 9).
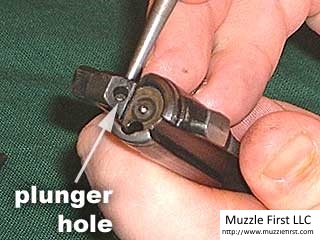
10) Remove extractor spring and extractor spring plunger.
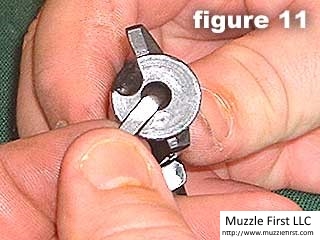
11) Grasp firing pin (as shown in figure 11).
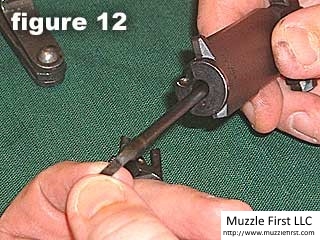
12) Remove the firing pin and set it aside.

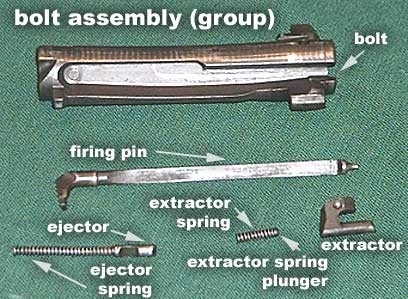
13) Figure 13 shows the disassembled bolt Assembly.
Reassembly Instructions
14) Return the firing pin to the bolt.
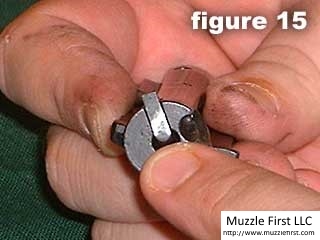
15) Make sure the firing pin rest in the firing pin slot on the
rear of the bolt (as shown in figure 15).
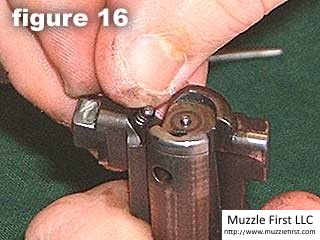
16) Return the extractor spring and extractor spring plunger (as
shown in figure 16).
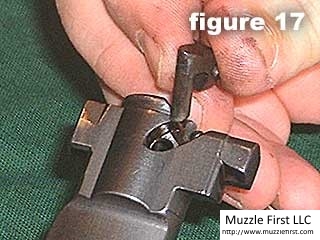
17) Return the extractor to the bolt. Do not push in
theextractor all the way.
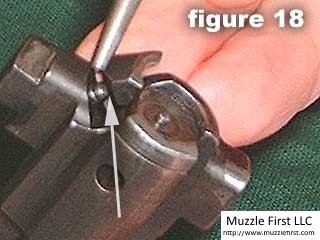
18) Note the extractor plunger pressing against theextractor.
When the extractor is fully inserted theextractor plunger
applies pressure against the extractor.
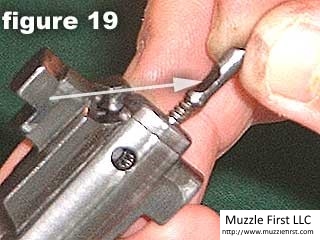
19) Return the ejector and ejector spring (as shown infigure
19). Note the arrow pointing to the groove on theejector. The
groove must be positioned so as when theextractor is fully
inserted that it can pass over the groove and lock both parts in
place.
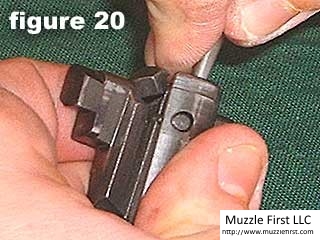
20) You can use the punch to push down on the ejectorwhile
pushing the extractor fully locked into place.

21) You can use the Garand Combo Tool to push theejector down
while pushing the extractor fully locked into place.
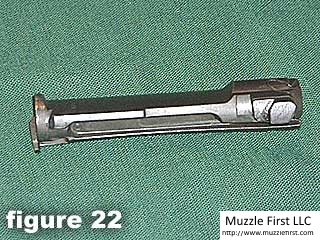
22) Figure 22 shows the fully assembled Garand bolt.


